
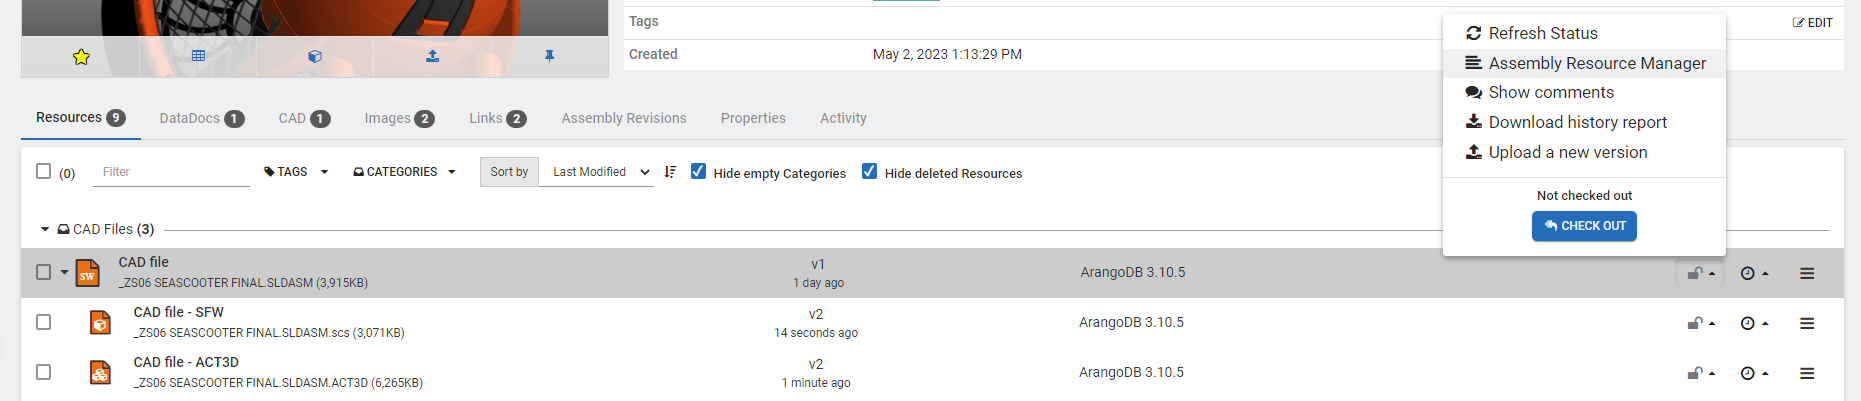
Assembly Resource Manager
The Assembly Resource Manager relieves a user from the tediousness from checking out and checking in large number of resources one at a time. The Assembly Resource Manager allows bulk check outs and check ins with a vision on entire assemblies at one time.

To initiate the Assembly Resource Manager, use the Centro Control pull down menu and select Assembly Resource Manager.
Resource Type
Use the Resource drop down to select the type of resource to view.

Action Tabs
Navigate to the appropriate tab.

Selection Count
The selection count keeps track at the number of files you are about to perform an operation on.

Quick Selections
Select all, deselect all, or remove the hierarchical indentations.

Icon Definitions
Different icons and colors indicate the control status of each file.
Icon | Meaning |
|---|---|
 | Available for check out |
 | Checked out by yourself |
 | Checked out by someone else |
 | The resource is missing. Not available for check out |
To perform an assembly check in:
On the Cancel Check in tab, select the resource file types to check out. Typically this will be CAD file.
Click Select files.
Browse and find the file(s) to fill the check in list.
Click Open.
Centro will automatically match up files based on filename. If it cannot make the association on its own, drag and drop the appropriate file from your check in file list.
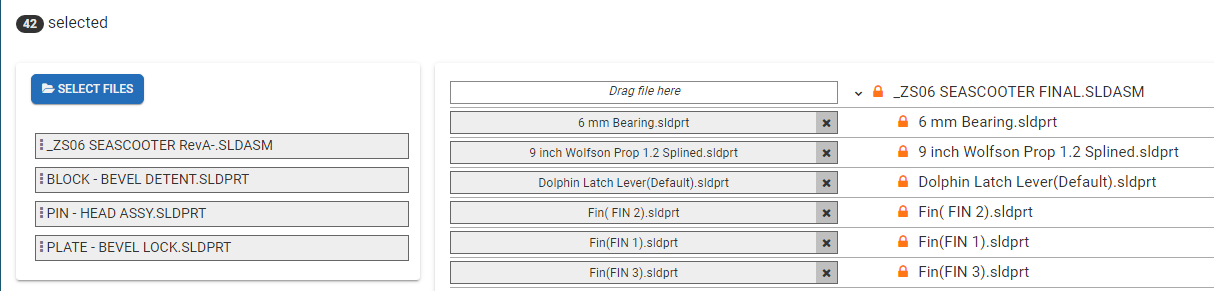
If Centro has associated an incorrect file, click the 'x' and find the correct file.Continue to select files for all appropriate checked out files.
Note: You are not required to check in all checked out files.Click the Check in button.