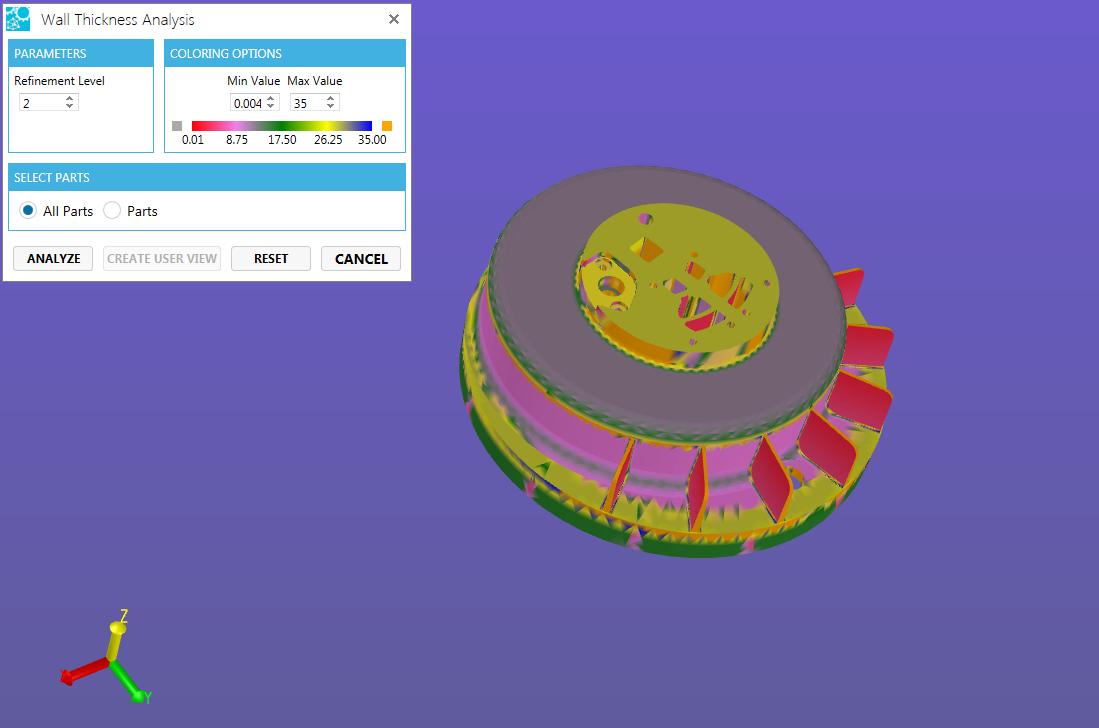
Wall Thickness Analysis
Discovery changes in thickness of parts using the Wall Thickness Analysis tool. One can quickly determine if parts are too thick or too thin with the color washing of the model.
SpinFire Ultimate's implementation of wall thickness analysis focuses on three attributes:
- performance,
- coloring quality, and
- accuracy of the measurements.
Of the several methods that could be used for calculating wall thickness for analysis, Actify uses the Ray method (ray casting) for performance reasons. In conjunction, SpinFire Ultimate can apply a refinement level which subdivides meshes triangles providing greater accuracy. The user controls the refinement level to their desire. Note: increasing refinement decreases performance.
In addition, SpinFire Ultimate applies Adaptivity for triangles where it detects where the thickness appears to change and increases triangles for better color quality. Triangle shape improvement (without change the shape of the model) with isotropic re-meshing techniques for even better results.
For additional performance boosts,calculations are threaded, running in parallel yet still avoiding total consumption of system resources.
To use the wall thickness analysis tool:
- Select Wall Thickness Analysis from the 3D tool bar.

- Enter a refinement level.
- Set the coloring options.
- Select parts to analyze.
- Click Analyze.
- Save the analysis for later review in a user view by clicking Create User View.

Refinement Level
Change the refinement level to produce a more accurate analysis of the wall thickness. Note that increasing the refinement will increase the time it takes to complete the analysis.
Refinement Level 1 Example
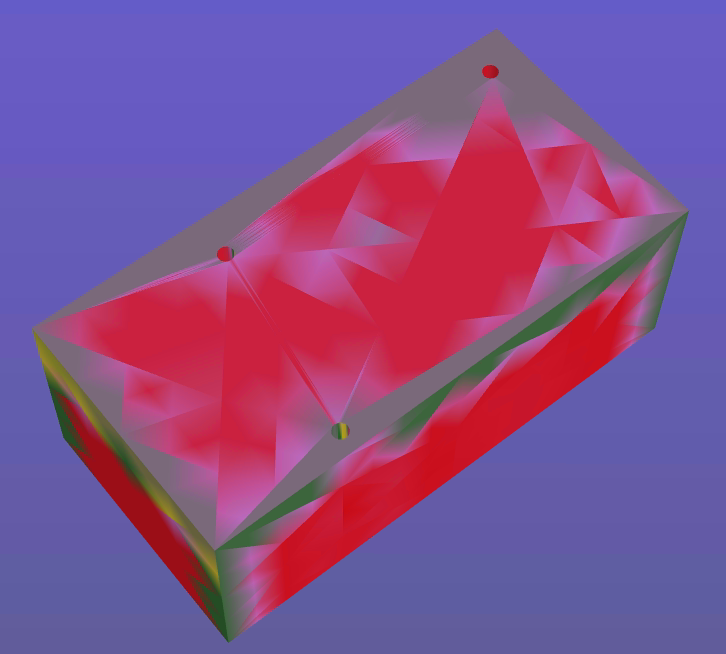
However, a greater refinement level may generate a far more accurate picture for the wall thickness revealing a cleaner and sharper view of the analysis.
Refinement Level 5 Example
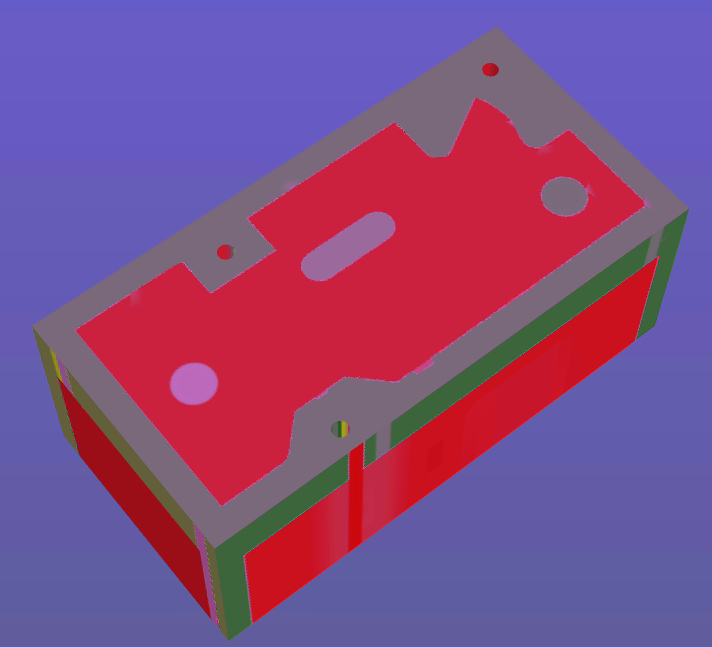
The refinement level basically changes the tessellation level of the model to produce a more accurate analysis. One can observe the tessellation change by viewing the model in wire mesh mode after the analysis.

Color Options
Enter the range of thickness values for the color representation.
Change any of the five main color gradients as well as the two that represent off the lower spectrum and off the upper spectrum

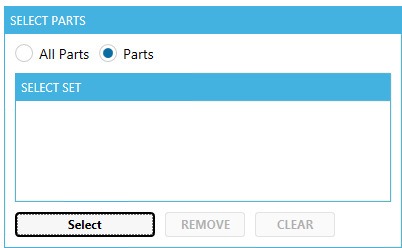
Select Parts
Choose to analyze all parts of the model or selected parts.
To select parts:
- Click the Parts radio button.
- Click the Select button to begin selection.
- Click on parts in the graphical area to add to the select set list.
- Click Stop select.
To remove an item from the list:
- Select an item in the list.
- Click the Remove button.
or
- Click the Clear button to remove all parts.