
Database Enterprise to Community Migration Procedure
Due to ArangoDB Enterprise Edition 3.9.x license requirements, your organization may decide to migrate to the Community version. The following provides a procedure to conduct such a migration.
To obtain a list of ArangoDB Enterprise edition benfits, see https://www.arangodb.com/enterprise-server/ .
Migrate from Enterprise 3.8.x to Community 3.9.x
Linux
The following outlines the steps to move from ArangoDB Enterprise edition v 3.8.x to ArangoDB Community edition v 3.9.x. The particular steps and screenshots were conducted on an Ubuntu system. Make adustments for the flavor of Linux you are running.
Approximate Execution Time: 20 - 30 minutes
In a Linux shell type,
arangosh -version
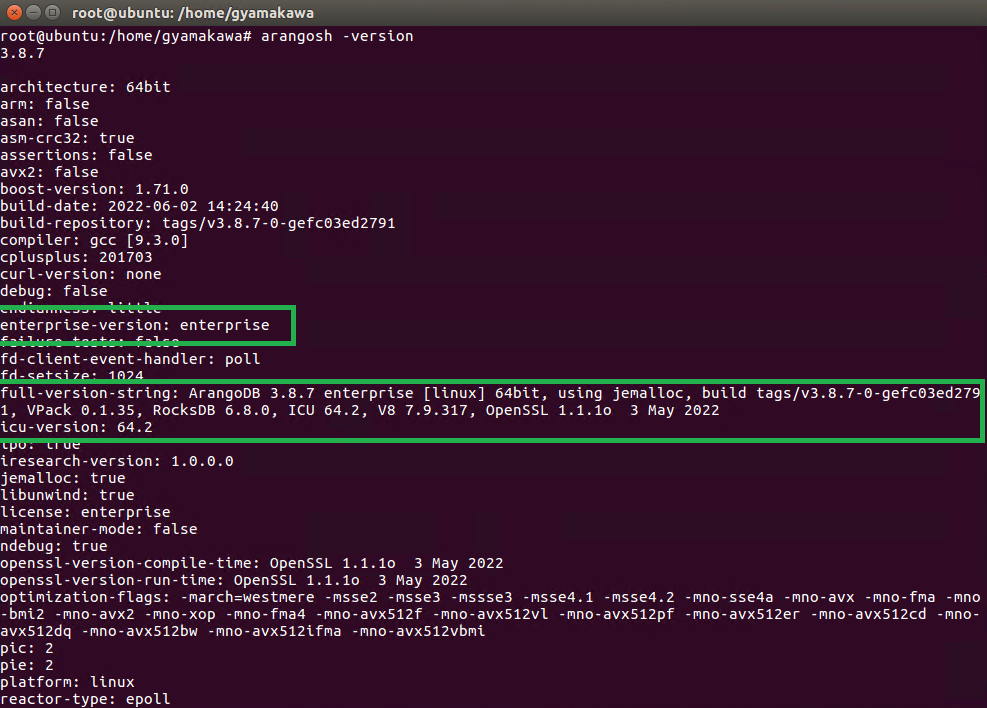
Or from the browser GUI, the login page identifies this.

Prevent any addtional changes to the database by shutting down Centro. First start wth the web app.
Notify your user base on downtime.
Make sure there are no files being processed in the Centro Pipeline Manager.
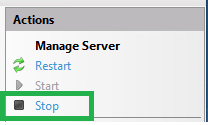
Bring up IIS Manager on your web server.
Click Stop on the right side.
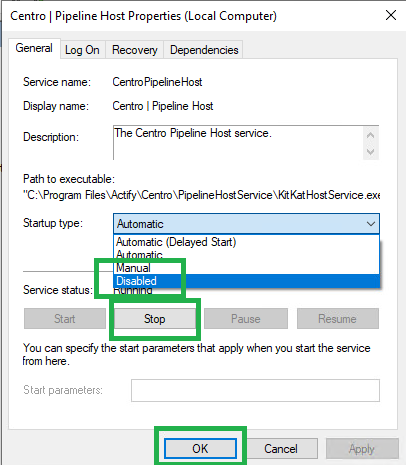
Stop and disable the Centro Pipeline Host service to prevent it from restarting on its own.
Bring up Services.
Double click on Centro | Pipeline Host.
Click Stop.
Set the Startup type to Disabled.
Click OK.
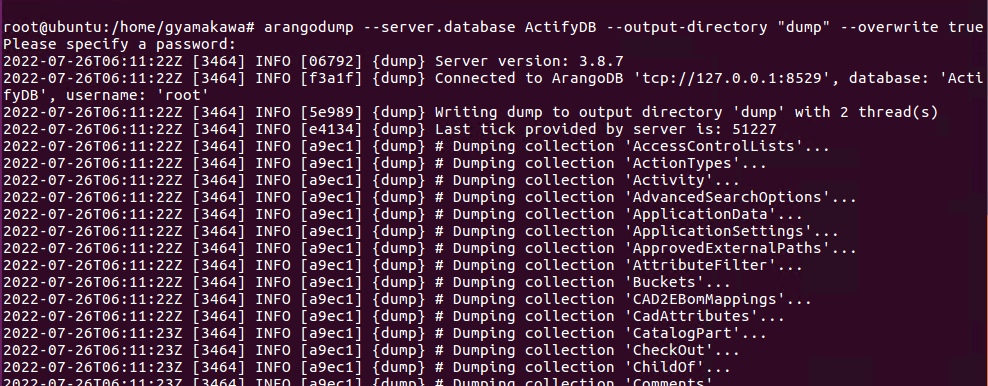
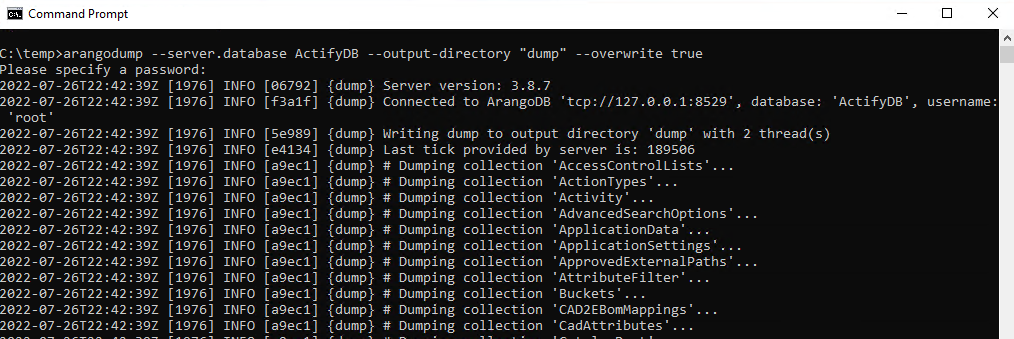
Back up the database usnig arangodump. Arangodump exports each Collection table in the specified database and stores the data in a respective json file in a specified directory.
On the command line, use the arangodump command.
Usage:arangodump --server.database [database name] --include-system-collections --output.directory "[dir name]"
Notes:
* The default Centro database name is ActifyDB.
* The directory the files are exported to does not have to exist beforehand.
Add --overwrite true if you rerun the command and want to overwrite the existing files.
Example
arangodump --server.database ActifyDB --include-system-collections --output-directory "dump" --overwrite trueAt the time of this writing there are 75 collections dumped.
On a command line type,
systemctl stop arangodb3Check arangodb3 has stopped by typing,
systemctrl status arangodb3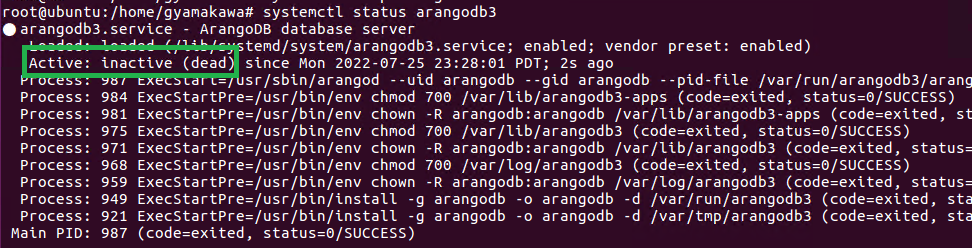
Uninstall the Enterprise version by typing,
sudo apt remove arangodb3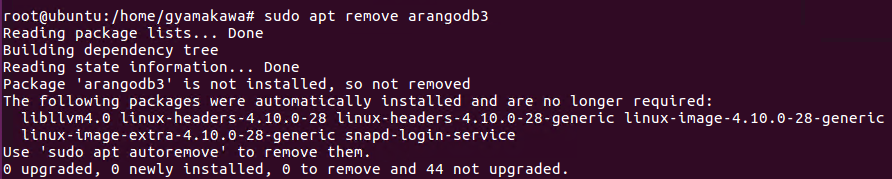
There may be remaining conf files left in /etc/arangodb3. You may choose to remove these as well.
The original installation files may also exist. You may choose to remove these by typing,
sudo apt autoremove arangodb3
Verify your update and data restore worked by conducting the following simple tests.
Verify the database is a Community version and is 3.9.x.
To do this login to the web GUI.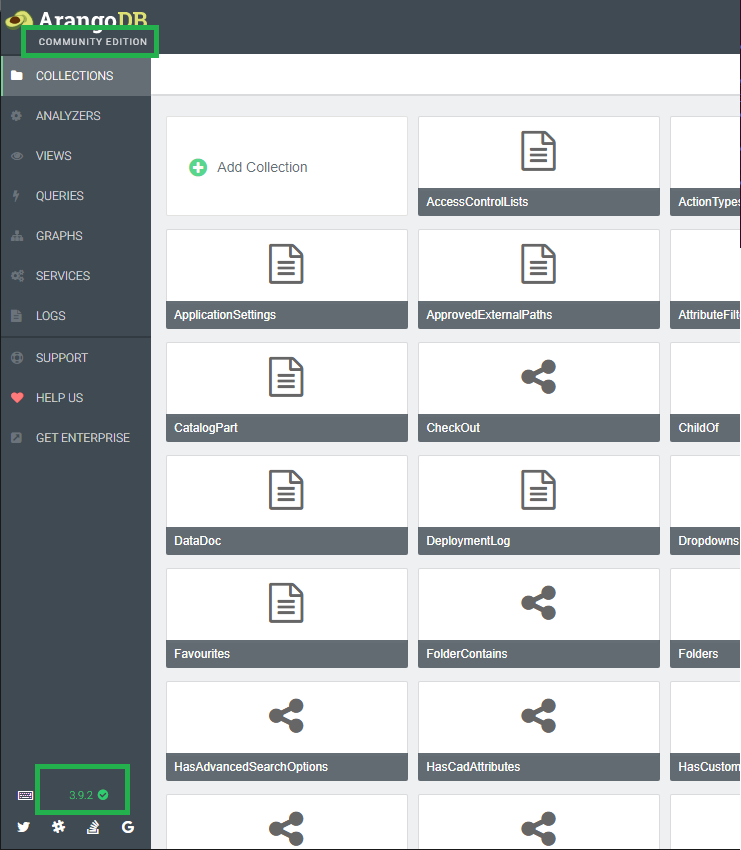
Login to Centro.
Logging into Centro validates the database is accessible.Read from database.
Navgate to a Catalog part in Centro.Write to the database.
Conduct a Generate with upload on part. A success here indicates Centro can write to the database and pipelines are functioning.Check security and accessiblity.
If there are additional securty or penetraton checks on the ArangoDB web GUI or other “entry points” based on your organization’s security policy do so.
Windows
The following outlines the steps to move from ArangoDB Enterprise edition v 3.8.x to ArangoDB Community edition v 3.9.x. on a Wndows system.
Approximate Execution Time: 30 - 45 minutes
On your Windows server that contains ArangoDB, in a command prompt, type
arangosh
Enter the root password.
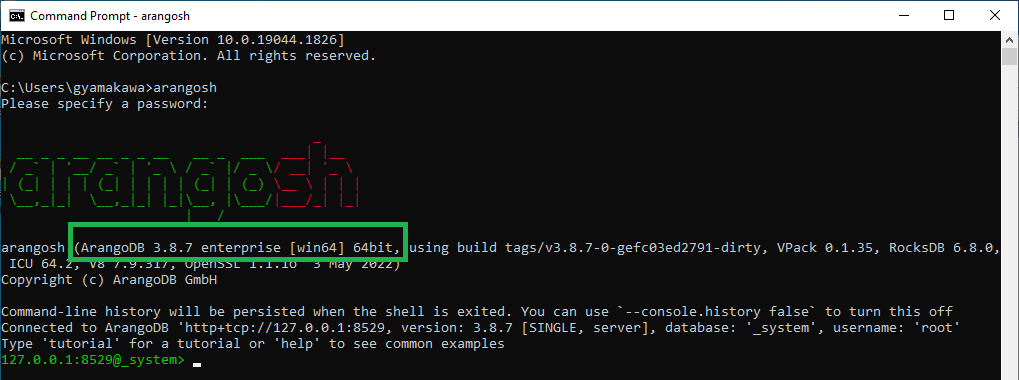
Or from the browser GUI, the login page identifies this.

Prevent any addtional changes to the database by shutting down Centro. First start wth the web app.
Notify your user base on downtime.
Make sure there are no files being processed in the Centro Pipeline Manager.
Bring up IIS Manager on your web server.
Click Stop on the right side.
Stop and disable the Centro Pipeline Host service to prevent it from restarting on its own.
Bring up Services.
Double click on Centro | Pipeline Host.
Click Stop.
Set the Startup type to Disabled.
Click OK.
Open a command prompt.
Navigate to an approprate folder.
On the command line, use the arangodump command.
Usage:arangodump --server.database [database name] --include-system-collections--output.directory "[dir name]"
Notes:
* The default Centro database name is ActifyDB.
* The directory the files are exported to does not have to exist beforehand.Add --overwrite true if you rerun the command and want to overwrite the existing files.
Example
arangodump --server.database ActifyDB --include-system-collections --output-directory "dump" --overwrite trueAt the time of this writing there are 75 collections dumped.
Stop the ArangoDB service.
Again bring up Services.
Double click on ArangoDB.
Click Stop.
Click OK.

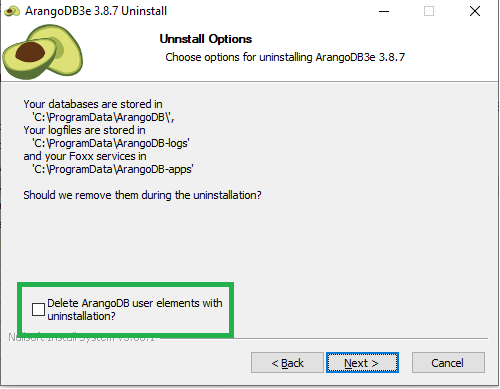
Open Programs and Features.
Select ArangoDB3e 3.8.7 in the list.
Click Uninstall/Change.

Follow the uninstall wizard.
When asked do not delete ArangoDB user elements.
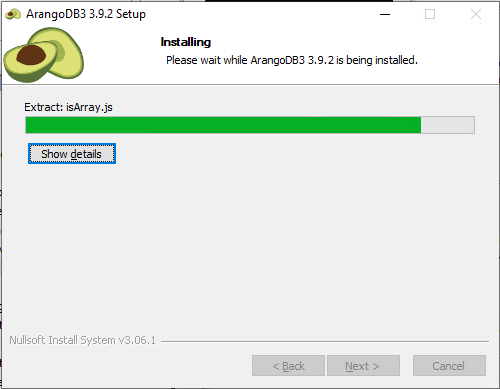
Download ArangoDB Community version 3.9.x for Windows from ArangoDB. Get the .exe installation for easy installation.
(https://www.arangodb.com/download/ )Double-click on the ArangoDB installation and follow the wizard instructions.
Once complete, stop the ArangoDB service in Services if it has started.
Adjust configuration such as any endpoint adjustments for GUI. The arangod.conf file can be found and edited in the C:\Program Files\ArangoDB3 3.9.2\etc\arangodb3 folder (depending if you’ve used the default and depending on the exact version).
You can apply the arangod.conf file save from step #8.If you utilize an encrypted link (SSL) between the database and Centro make those adjustments.
Restart the ArangoDB service in Services,
Verify your update and data restore worked by conducting the following simple tests.
Verify the database is a Community version and is 3.9.x.
To do this login to the web GUI.Login to Centro.
Logging into Centro validates the database is accessible.Read from database.
Navgate to a Catalog part in Centro.Write to the database.
Conduct a Generate with upload on part. A success here indicates Centro can write to the database and pipelines are functioning.Check security and accessiblity.
If there are additional securty or penetraton checks on the ArangoDB web GUI or other “entry points” based on your organization’s security policy do so.
Troubleshooting
The above procedure is fairly simple however these are some possible anticipated issues.
My Centro Pipeline services do not start nor can I get to the Centro login page.
This typically means your Centro server cannot contact and log into the ArangoDB.
Here are a few suggestions to help resolveMake sure your Centro server can access the database.
The easiest way to check on this is to try and vew the database through the Arango Web GUI.
If you can’t reach it,Try to ping the database server.
Check your firewall settings.
Check your endpoints in the arangod.conf file.
Verify your passwords are correct.
Verify the ArangoDB service is running.
Check firewall settings.
I didn’t download the same version of ArangoDB Community 3.9.x as shown in the screenshots. Is this ok?
In general, this should be fine as long as it’s a newer version of ArangoDB 3.9.
You may need to adjust a directory name from the steps listed above but otherwise the procedure should remain the same.We don’t have our own IT department. Is this something that Actify can help us with?
Call your Actify sales representative as they may be able to generate a service contract depending on timing and availability.
Official ArangoDB Downgrade Documentation
https://www.arangodb.com/docs/3.8/downgrading.html#supported-downgrade-procedures