
Installation
Requirements
Centro Server
Windows OS:
Win10 64-bit, Win Server 2016/2019/2022
Memory: 16GB or more
Disk Space: 80GB or more
Database Server
Windows OS:
Win10 64-bit, Win Server 2016/2019/2022
Linux OS:
Ubuntu v23.10, Debian v12.5.0
Memory: 16GB or more
Disk Space: 80GB or more
See the ArangoDB Compatibility Chart
Client
WebGL Compatible Browser: FireFox, Chrome, Edge
Memory: 2GB or more

About
Centro Pipelines can be configured to automate data conversions and catalog updating so that the current correct information is made available to the user community.
Centro is a 64-bit server-based scalable application operating from a graph database. Installation involves four components:
Centro can be installed on either LInux or Windows Servers. See Server Requirements on this page.
Before You Begin
Check the Server Requirements and Prerequisite Software
Enable PowerShell in Administrator Mode
Prerequisite Software
Internet Information Services
.NET Framework 4.8
Microsoft Edge of Google Chrome
Note: Internet Explorer is no longer supported
Prerequisite Steps
There are a few steps required before installing C7. You'll need to run PowerShell in administrator mode.
To do this:
Go to the Start menu.
Select Accessories > Windows PowerShell
Right mouse click on Windows PowerShell and select Run as administrator.
Windows Server Setup
For Windows Server, add the following roles and features as described for the specified version.
For Windows 10 web app servers, there are needed Windows features that need to be enabled.
To enable these in Windows 10,
Launch Control Panel.
Click Get Programs.
Click Turn Windows features on or off.
Expand Internet Information Services > World Wide Web Services > Application Development Features.
Check .NET Extensibility 3.5.
Check .NET Extensibility 4.x.
Check ASP.NET 3.5.
Check ASP.NET 4.x.
Check ISAPI Extensions.
Check ISAPI Filters.
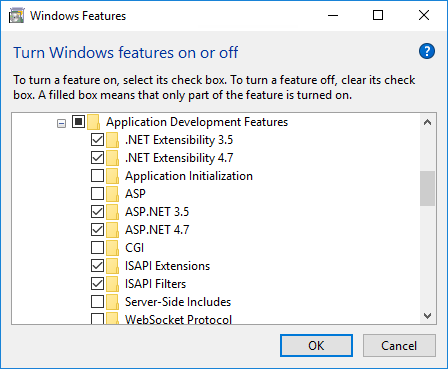
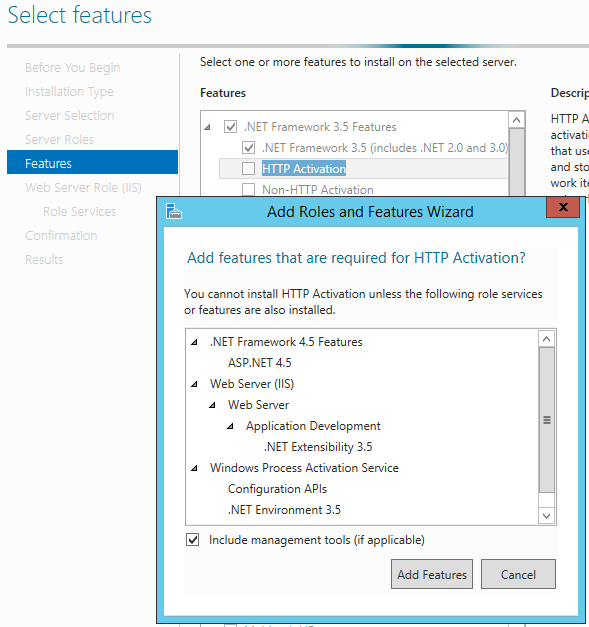
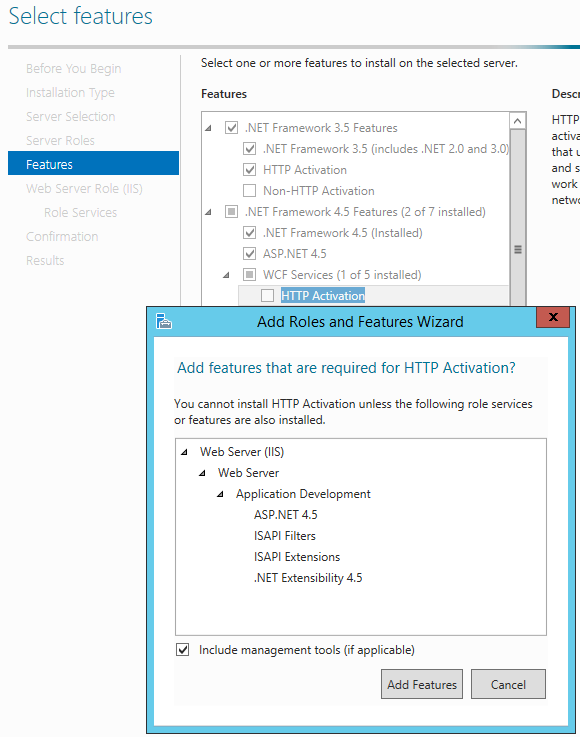
Expand ASP.NET 4.x
Check HTTP Activation.
Check Named Pipe Activation.

Expand Internet Information Services > World Wide Web Services > Common HTTP Features.
Check Default Document.
Check Directory Browsing.
Check HTTP Errors.
Check Static Content.
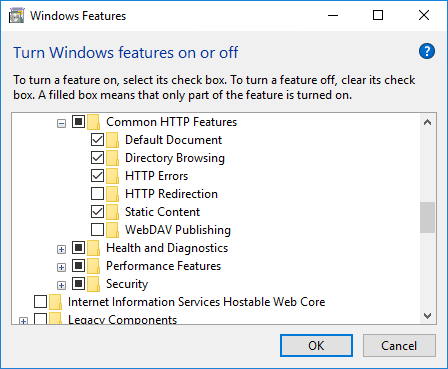
Click OK.
Select Web Server (IIS) under Server Roles

Select the pictured features
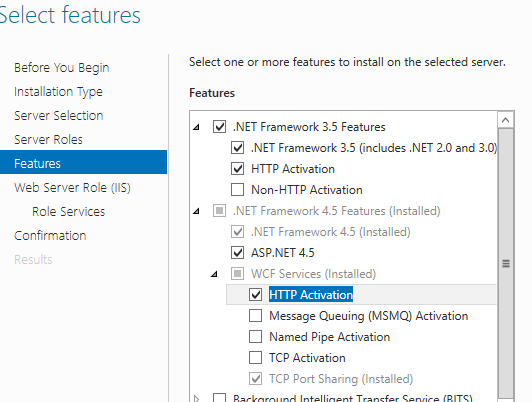
Select Message Queuing (MSMQ).

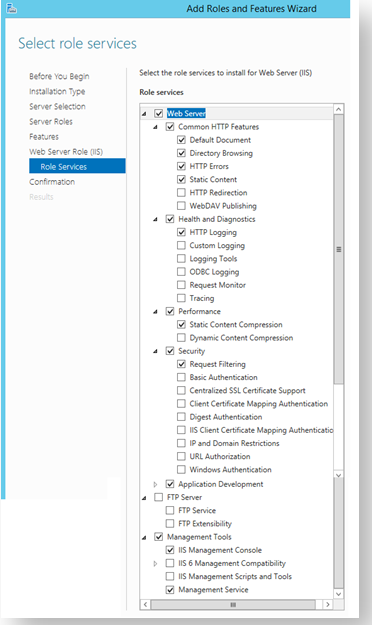
For the Web Server Role (IIS) role service, select the pictured role services
Install the roles and services.
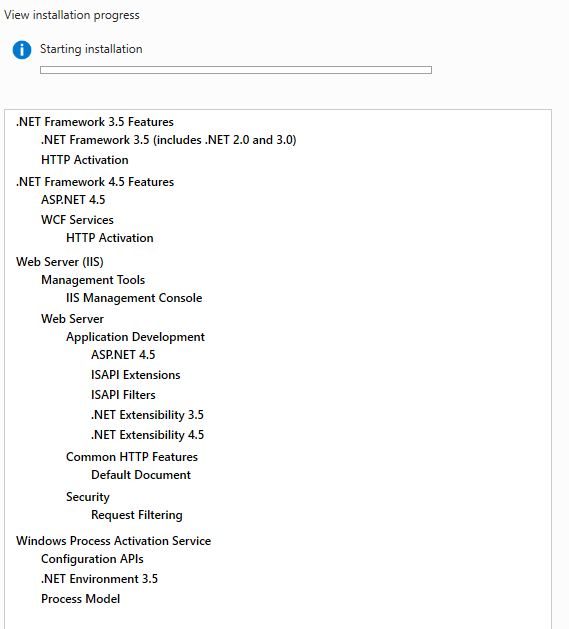
Confirm the selected roles and features.

Select Web Server (IIS) under Server Roles

Select the pictured features
Select Message Queuing (MSMQ).
For the Web Server Role (IIS) role service, select the pictured role services.
Add the services shown below for the Web Server Role.
Confirm selections.

For Windows Server 2016, add the roles and features as described for the 2012 R2 section, except for .Net 3.5. You will have to install the other Roles and Features first, do a reboot, then install .Net 3.5.
Continue with the pre-installation items:
Copy/download the installation files to a single temporary folder. For example: C:\Centro\
Open the "Turn Windows features on or off" window, and locate and check the following:
Windows 7: Microsoft .NET Framework 3.5.1 -> Windows Communication Foundation Non-HTTP Activation
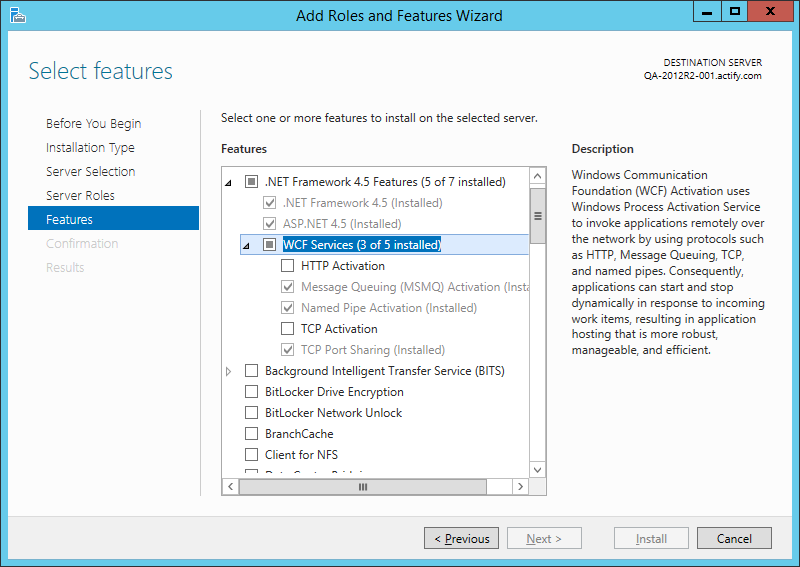
Windows 8: .NET Framework 4.5 Advanced Features -> WCF Services -> Named Pipe Activation
Windows 10: .NET Framework 4.6 Advanced Features -> WCF Services -> Named Pipe Activation
If installing a One-Pager Dashboard, you must also install Web Deploy
Select Custom
Select IIS Deployment Handler
Select Management Services
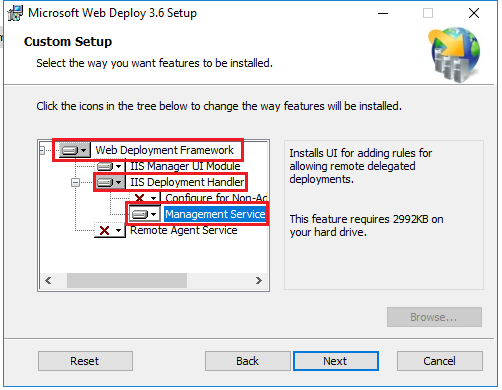
(https://www.iis.net/downloads/microsoft/web-deploy).
Also make sure the Web Server→Management Tools→Management Service is installed
Centro User Credentials
The following items must have Read/Write access to network locations where the CAD data is stored and Centro needs to connect to. The CAD data is typically stored in network paths defined in the pipelines.
Services > Centro | Pipeline Host Service
IIS > Application Pool > CentroPool
Installation Steps
Distributed Deployments
For distributed deployment configurations see Distributed Deployment before beginning installing.
Licensing
To apply licensing, refer to Centro Licensing.
WARNING: Do not apply a floating license to Centro. This is not supported and will cause unwanted results.