
Using Azure AD
Summary
For organizations using Azure AD, Admins can configure the Actify system to treat the company’s Azure AD system as the Identity Provider (IDP), enable SSO for end-users via Microsoft Sign-on and manage Actify access via Azure AD groups or IDs.
Importantly, if users are removed from Azure AD, they will automatically lose access to Actify. If users are added or updated in Azure AD, their information can be synchronized with Actify through this function.
If required, local users can continue to be defined/managed within Actify, for example to create/maintain additional logins that are not governed by Azure AD. Any pre-existing local users with matching profiles can be mapped to their Azure AD.
Users previously migrated/linked via LDAP may also be migrated to AzureAD.
Prerequisite
In order for the Actify systems to be able to browse a customer’s Azure Active Directory, customers will need to communicate their public Azure Tenant ID to Actify. See https://learn.microsoft.com/en-us/azure/active-directory/fundamentals/how-to-find-tenant for info on how to find this ID.
Once this ID is communicated to Actify, Actify will configure its systems to point to that specific directory, and customers will be able to start the setup via the Admin page.
Setup & Approach Overview
The key steps for an Azure Admin, are:
Select the Azure AD Groups to import or map into Actify.
as Azure AD Groups may be very large, filtering and batching features are provided to make this efficient.
Select specific Users to import into Actify.
If there are pre-existing (local) users defined within Actify which match the Azure AD name, the Admin can choose to link them (i.e., control them from Azure AD) or not (i.e., leave them as local users controlled within Actify).
Select any existing Roles to assign to all Users marked for import. Or;
Select Azure AD Groups to create Actify Roles (from the Azure AD Group names) that will be applied only to matching Users from the selected Azure AD Groups.
Steps
Important: Before starting, ensure that:
The Users and Groups you intend to enable in the Actify system already exist within the target Azure AD domain.
The Actify Admin user can be granted access to that Azure AD domain.
The Actify Admin has “Can Access Azure AD administration” permission in Actify.
1. Grant access for the Admin User
Permissions
In order to manage import from Azure AD, the Actify Admin requires appropriate access permissions.
In Actify, the Admin must have the “Can access Azure AD administration” to access the “Azure AD” Admin tab.
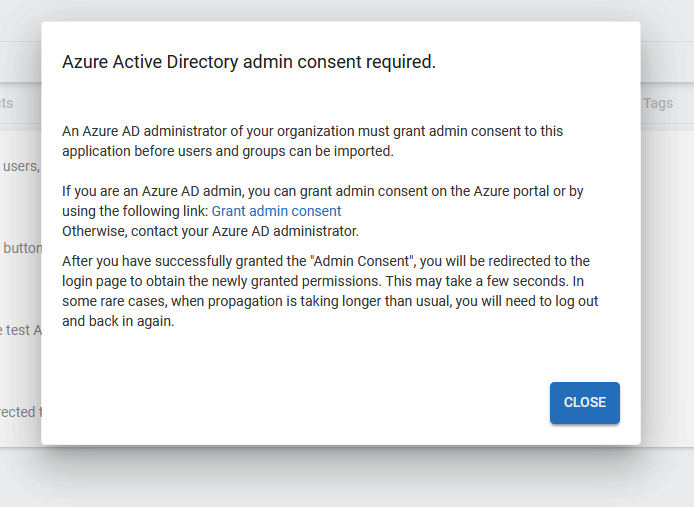
In Azure, consent must be granted - once - for the Actify Admin to access the Azure system (and the applicable Azure AD domain).
Admin consent must be granted in the Azure authentication app for your Azure account. This consent only needs to be given once. If you possess admin rights in the Azure domain, you can use the provided link to grant consent for your account. Otherwise, the consent must be granted for your account to
Group.Read.AllandUser.Read.Allpermissions by the Azure Domain administrator using the authentication app installed in the target domain.
Logging in
As the Actify Admin, you can log in as usual with your Username and Password. You then have the option to either temporarily or permanently link your Account with your Azure AD account for importing purposes.
If you already have the account linked, simply log in via the “Sign in with Microsoft” link on the login page and proceed to step 2.
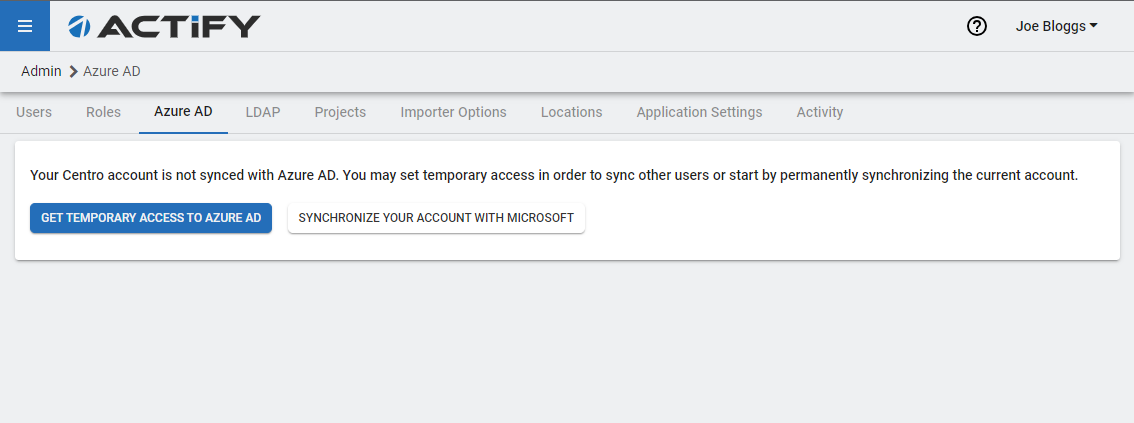
If the Azure AD access consent has yet to be granted, a link to do so will be provided.
2. Select the Azure AD Groups to import into Actify
This step defines the Groups from which Users will be loaded.
Once you have a linked account, you can “Fetch Azure AD Accounts” and select the applicable Groups. As the import process can take some time with a large number of groups, filtering options are provided.
Filtering (Optional)
For convenience, there is an option (for organizations with many groups) to filter groups in advance using the “Group Pre-Filtering” dialog. The initial group batch will load, offering choices for subsequent batches or loading of all groups. You can further narrow down the displayed groups using the interactive filter.
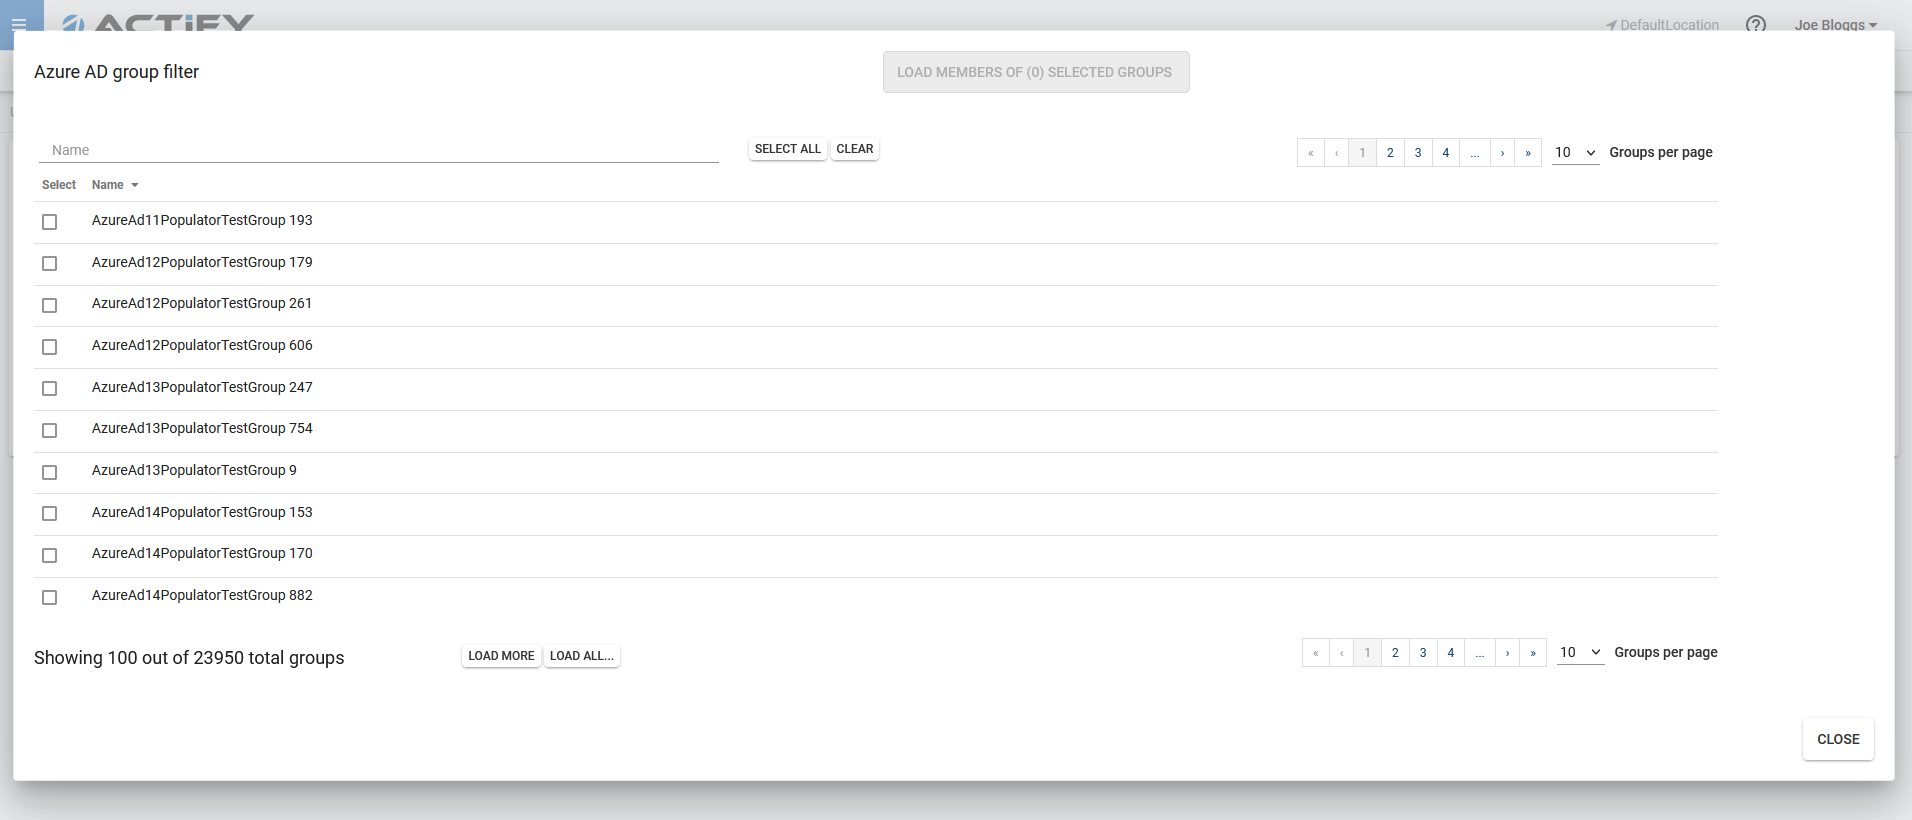
Select the required Groups and click the blue “Load” button to be shown the Users for the selected Groups.
Note: Selecting many groups may result in lengthy load times
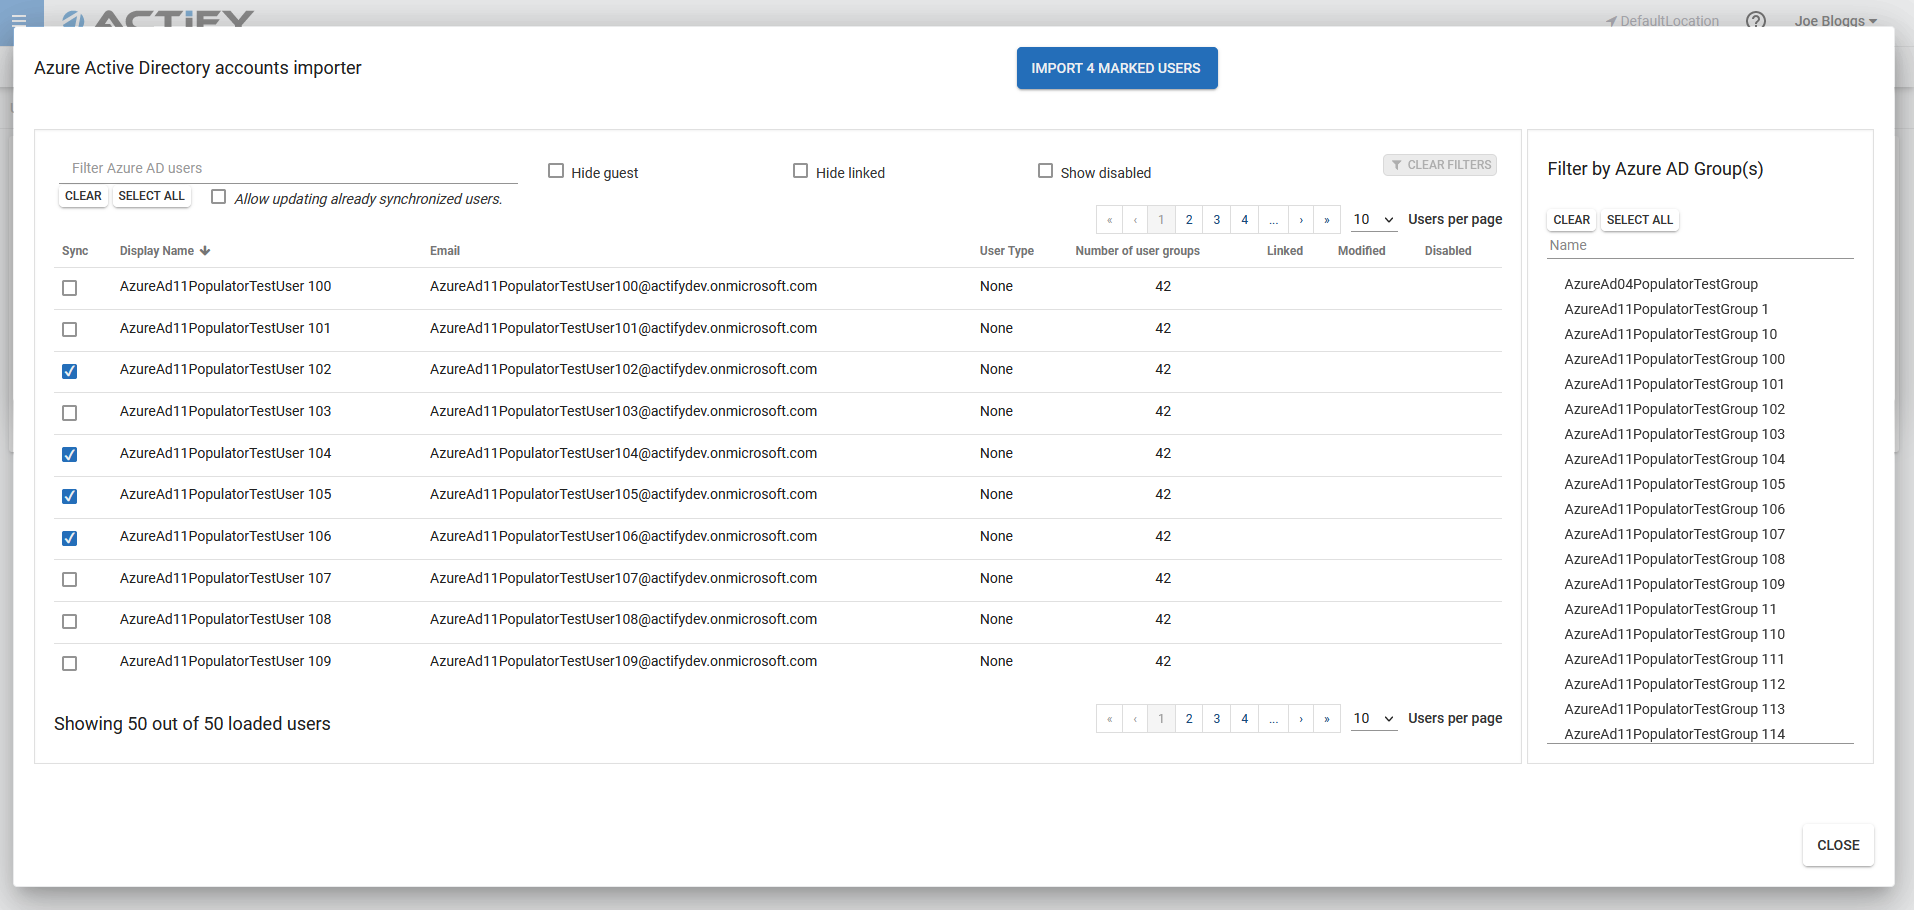
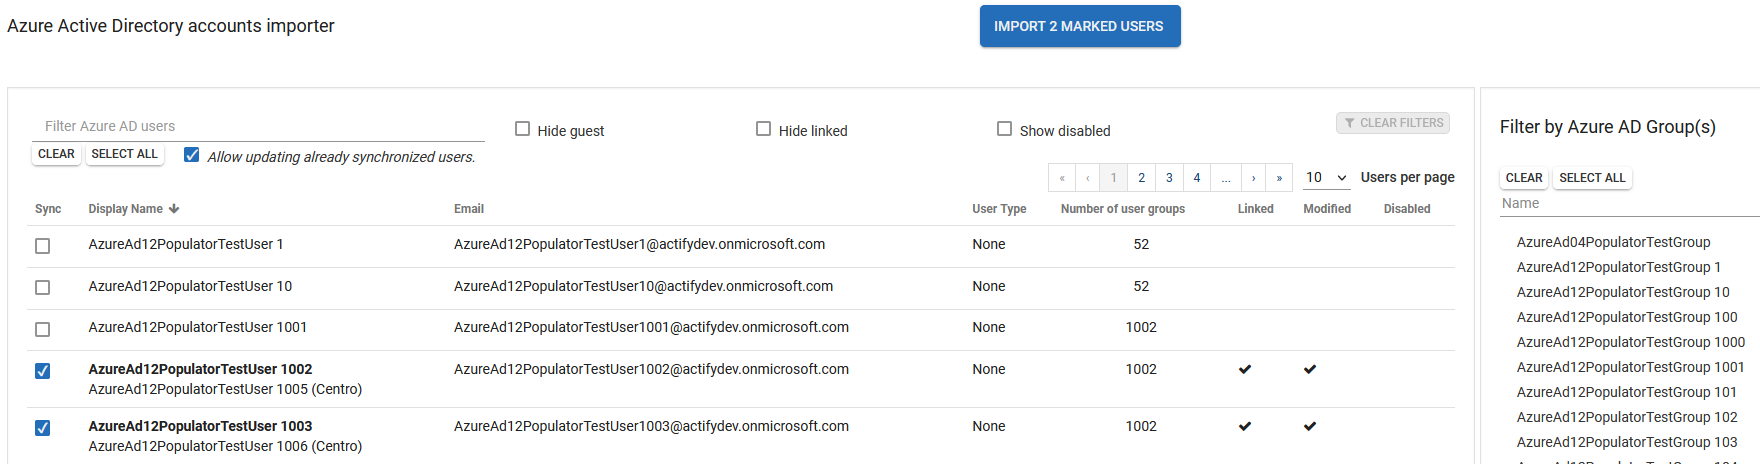
3. Select specific Users to import into Actify
This step allows marking the loaded Users for import.
The resulting Users list can also be filtered to reduce the scope to select appropriate users. Click the blue “Import” button to load them.
The next step (3) defines how the Imported users will be mapped to Actify roles.
Allow updating already synchronized Users (Optional)
If users have been modified in Azure AD, you can synchronize those changes with Actify. To achieve this, choose the Allow updating already synchronized users option, select the respective users, and proceed with the import.
Then, changes made in Azure Ad are synchronized with Actify.
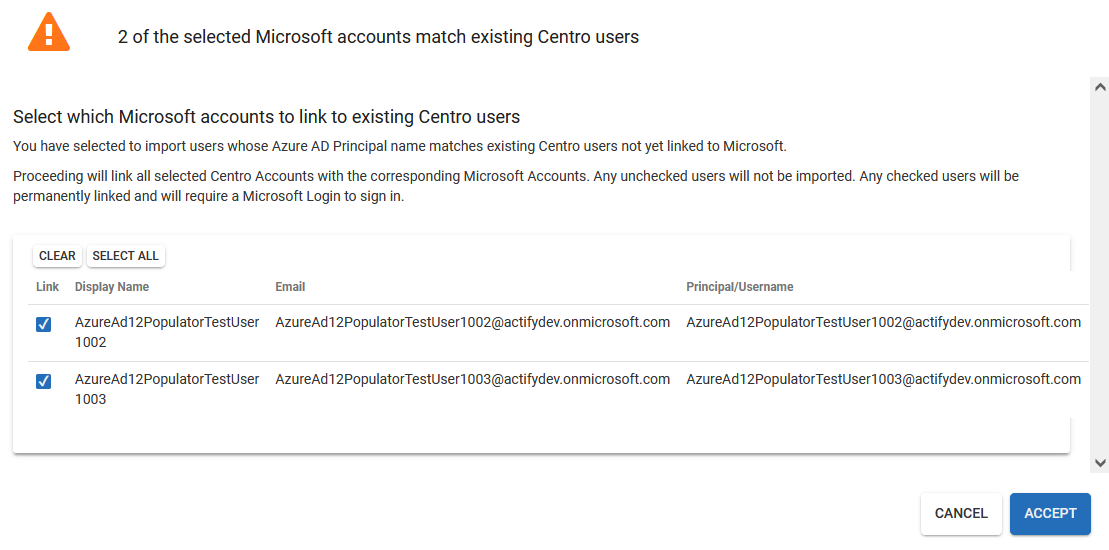
If certain users in your organization have already been manually added to Actify and their names match their Azure AD accounts, they can also be synchronized. You'll receive a prompt to confirm that these users are the same.
4. Assign Roles to all Users marked for import OR Create Roles from Azure AD Group names and assign to Users from the selected Azure AD Groups
This step determines what roles the imported Users will be assigned in the system.
There are two options;
Select any existing Roles to assign to all Users marked for import.
Select Azure AD Groups to create Actify Roles (matching Azure Ad Group names) that will be applied only to Users from the matching Azure AD Groups.
Select the Roles to be assigned:
Use
CtrlorShiftplusclickto select multiple Roles.
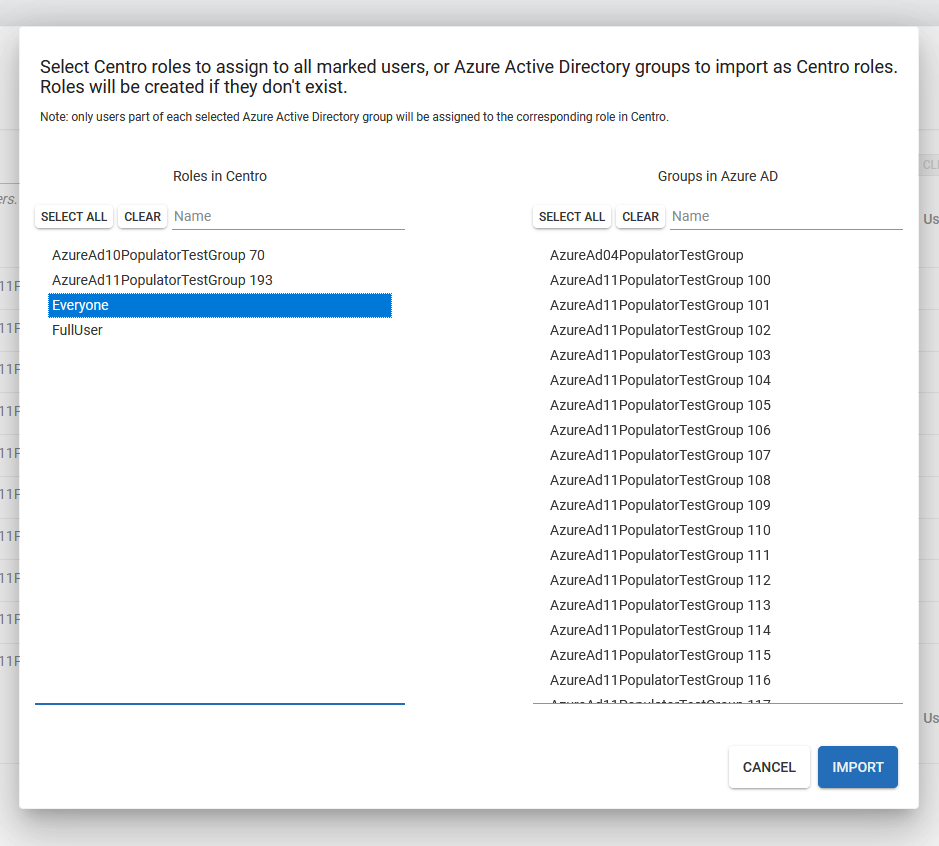
Selected pre-existing Roles (left panel) will be assigned to all marked users.
Selected AzureAD Groups (right panel) will either be assigned to an existing Actify Role matching the Azure Active Directory Group name, or a new Role will be created from the Group name, if a matching Role does not already exist.
Example import detail:
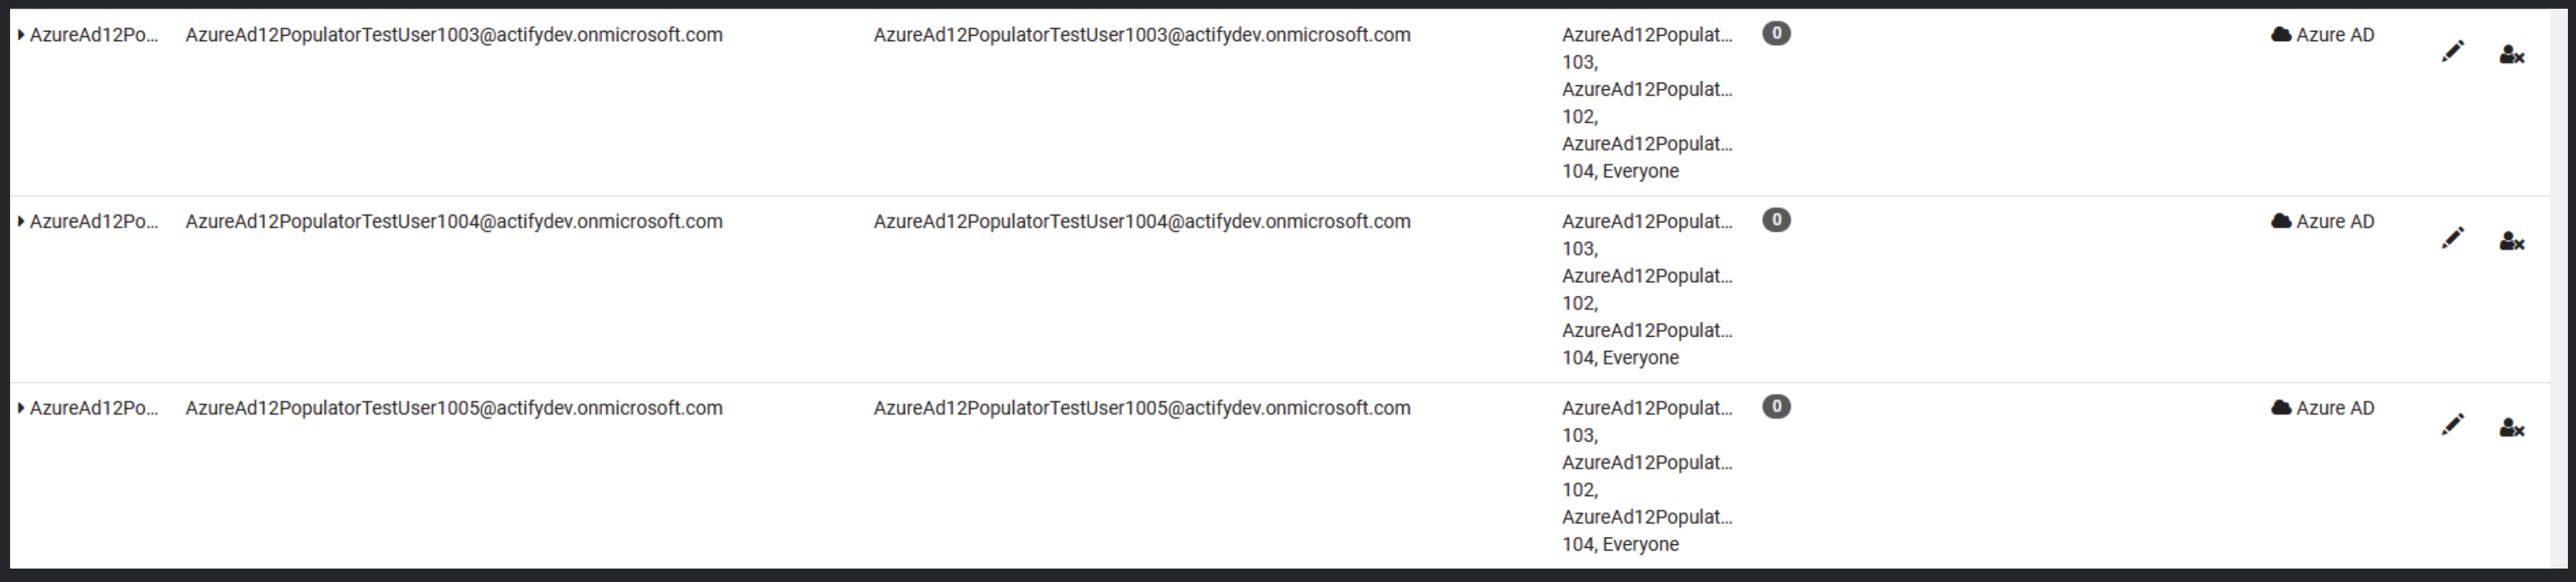
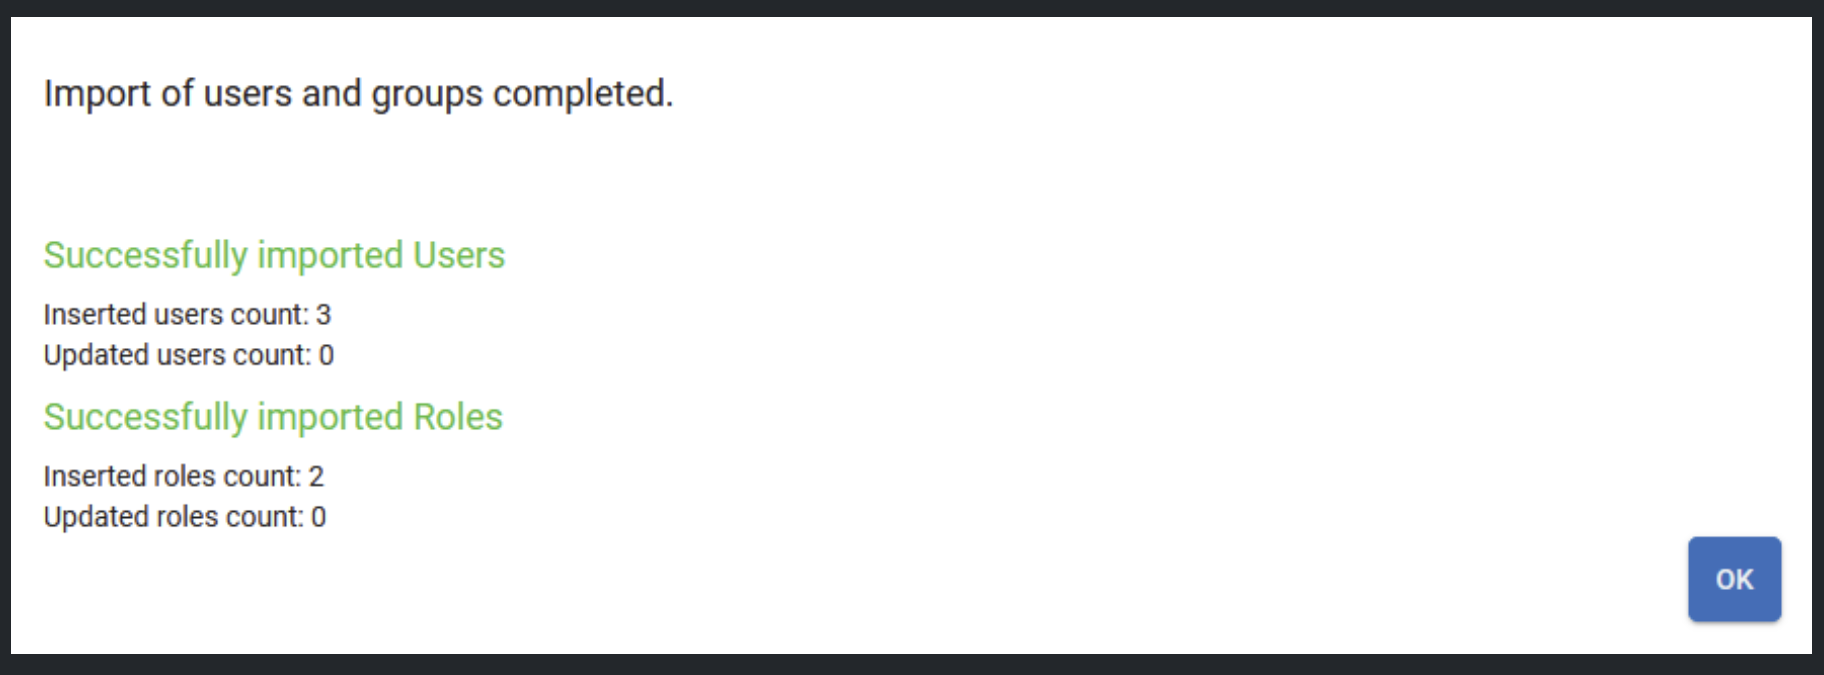
Example import summary:
Demonstration
This video illustrates the process including
The optional Group Pre-Filter step described in Step 2 - Filtering.
Resolving conflicts from manually imported Users Described in Step 3 - Allow updating already synchronized Users.
Azure AD User import Demo