
Section Profile
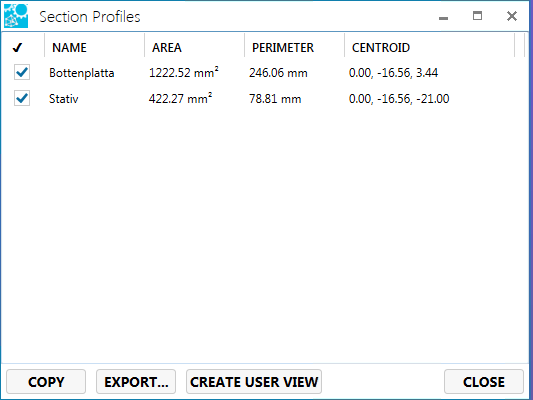
Section profile calculates the area, perimeter, and centroid of a cross section. This should prove to be valuable for many users. Anyone needing to calculate stamping pressures for example will find this feature of massive benefit.
Section profiles can only be used with single plane cross sections. It is an improved replacement for the XSection Plus plug-in from SpinFire 10.
Usage
To use the section profile
- Create a section cut.
- Right mouse click on the section plane.
- Select Profiles....

Copy Data to Clipboard
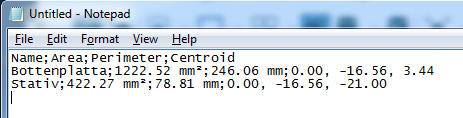
The information in the Section Profiles dialog box can be copied to the system clipboard in a semicolon (';') delimited format.
To copy to the clipboard:
- Check the check box with the associated items to copy to the clipboard.
- Click Copy.
- Paste to an application accepting text.from the clipboard.
Export Section Profile Data
Export the information in the section profile table to a .TXT, .CSV, .XML, .XLS, or .XLSX format.
To export data to a file:
- Click Export...

- Select a location.
- Enter a file name.
- Select the file type.
- Click Save.
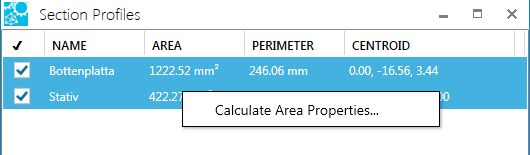
Calculate Area Properties
Area mark ups can be created showing area, perimeter length, and centroid.
To calculate area properties:
- Select part or parts to perform the calculation by highlighting them with a right mouse click on the list or a left mouse click on the graphical representation.
- Use the SHIFT key or CTRL key in combination with mouse clicks to select multiple parts.

- Use the SHIFT key or CTRL key in combination with mouse clicks to select multiple parts.
- Right mouse click on the selected items, and click Calculate Area Properties...
- Place the mark up.
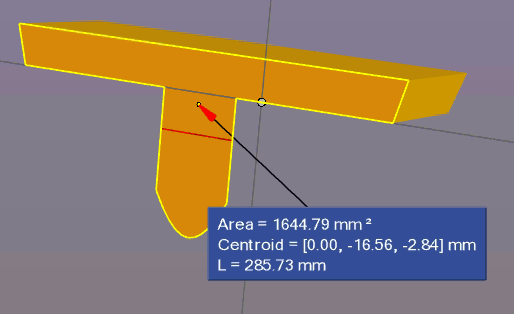
Note: For multiple part calculations, especially where parts share edges, perimeters are calculated with the appropriately removing shared edge lengths.
Create a User View
Save the section profile view to a user view to review and access at later time.
To create a user view:
- With the Section Profiles dialog up, arrange the graphical view to one's liking.
- Add area properties mark ups if need be.
- Click Create User View.
The user view is saved with the name as "Profiles (#)" where # is the profile number.
Markups are automatically associated to the new user view.
