Working with Linear Measurements
Linear Measurements
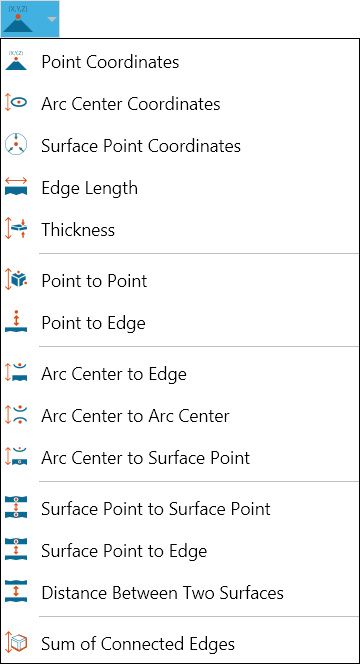
Determine point coordinates
- Open the Linear menu on the 3D Document Toolbar. (Click the drop-down arrow to the right of the Linear icon to see the menu of commands.)
- Select Point Coordinates.
- Optional:
- Select Lock tool to use the command more than once.
- Enter a hyperlink to a file or to a document and user view within the current file.
- Position your cursor on the point whose coordinates you want to see and click. (Crosshairs appear when you mouse over a selectable point.)
- Drag and click to position the markup in the scene.
- Optional: Click Copy to copy the markup content to the Windows clipboard.
- Click Stop when you're finished taking multiple measurements. Click Close (or X) to end the command and close the dialog box.
Determine coordinates of an arc center
- Open the Linear menu on the 3D Document Toolbar. (Click the drop-down arrow to the right of the Linear icon to see the menu of commands.)
- Select Arc Center Coordinates.
- Optional:
- Select Lock tool to use the command more than once.
- Enter a hyperlink to a file or to a document and user view within the current file.
- Position your pointer over the arc whose center coordinates you want to see and click. (Selectable arcs are highlighted as you mouse over them.)
- Drag and click to position the markup in the scene.
- Optional: Click Copy to copy the markup content to the Windows clipboard.
- Click Stop when you're finished taking multiple measurements. Click Close (or X) to end the command and close the dialog box.
Determine coordinates of a point on a surface
- Open the Linear menu on the 3D Document Toolbar. (Click the drop-down arrow to the right of the Linear icon to see the menu of commands.)
- Select Surface Point Coordinates.
- Optional:
- Select Lock tool to use the command more than once.
- Enter a hyperlink to a file or to a document and user view within the current file.
- Position your cursor on the point whose coordinates you want to see and click. (Crosshairs appear as you mouse over selectable points and the surface is highlighted.)
- Drag and click to position the markup in the scene.
- Optional: Click Copy to copy the markup content to the Windows clipboard.
- Click Stop when you're finished taking multiple measurements. Click Close (or X) to end the command and close the dialog box.
Measure an edge length
- Open the Linear menu on the 3D Document Toolbar. (Click the drop-down arrow to the right of the Linear icon to see the menu of commands.)
- Select Edge Length.
- Optional:
- Select Lock tool to use the command more than once.
- Enter a hyperlink to a file or to a document and user view within the current file.
- Position your pointer over the edge whose length you want to measure and click. (Selectable edges are highlighted as you mouse over them.)
- Drag and click to position the markup in the scene.
- Optional: Click Copy to copy the markup content to the Windows clipboard.
- Click Stop when you're finished taking multiple measurements. Click Close (or X) to end the command and close the dialog box.
Measure a surface thickness
- Open the Linear menu on the 3D Document Toolbar. (Click the drop-down arrow to the right of the Linear icon to see the menu of commands.)
- Select Thickness.
- Optional:
- Select Lock tool to use the command more than once.
- Click a radio button to select a measurement axis (the default is Normal).
- Enter a hyperlink to a file or to a document and user view within the current file.
- Position your pointer over the surface whose thickness you want to measure and click. (Selectable surfaces are highlighted as you mouse over them.)
- Drag and click to position the markup in the scene.
- Optional: Click Copy to copy the markup content to the Windows clipboard.
- Click Stop when you're finished taking multiple measurements. Click Close (or X) to end the command and close the dialog box.
Measure the distance from point to point
- Open the Linear menu on the 3D Document Toolbar. (Click the drop-down arrow to the right of the Linear icon to see the menu of commands.)
- Select Point to Point.
- Optional:
- Select Lock tool to use the command more than once.
- Click a radio button to select a measurement axis (the default is Normal).
- Enter a hyperlink to a file or to a document and user view within the current file.
- Position your cursor on the first point and click. (Crosshairs appear as you mouse over selectable points.) The selected point is yellow.
- Select the end point.
- Drag and click to position the markup in the scene.
- Optional: Click Copy to copy the markup content to the Windows clipboard.
- Click Stop when you're finished taking multiple measurements. Click Close (or X) to end the command and close the dialog box.
Measure the distance from a point to an edge
- Open the Linear menu on the 3D Document Toolbar. (Click the drop-down arrow to the right of the Linear icon to see the menu of commands.)
- Select Point to Edge.
- Optional:
- Select Lock tool to use the command more than once.
- Click a radio button to select a measurement axis (the default is Normal).
- Enter a hyperlink to a file or to a document and user view within the current file.
- Position your cursor on the first point and click. (Crosshairs appear as you mouse over selectable points.) The selected point is yellow.
- Select the edge. (Selectable edges are highlighted.)
- Drag and click to position the markup in the scene.
- Optional: Click Copy to copy the markup content to the Windows clipboard.
- Click Stop when you're finished taking multiple measurements. Click Close (or X) to end the command and close the dialog box.
Measure the distance from an arc center to an edge
- Open the Linear menu on the 3D Document Toolbar. (Click the drop-down arrow to the right of the Linear icon to see the menu of commands.)
- Select Arc Center to Edge.
- Optional:
- Select Lock tool to use the command more than once.
- Click a radio button to select a measurement axis (the default is Normal).
- Enter a hyperlink to a file or to a document and user view within the current file.
- Position your cursor on an arc and click. (Selectable arcs are highlighted as you mouse over them.) The selected arc remains highlighted.
- Select the edge. (Selectable edges are highlighted as you mouse over them.) The selected edge remains highlighted.
- The arc center and the measurement end point appear in yellow. Drag and click to position the markup in the scene.
- Optional: Click Copy to copy the markup content to the Windows clipboard.
- Click Stop when you're finished taking multiple measurements. Click Close (or X) to end the command and close the dialog box.
Measure the distance between two arc centers
- Open the Linear menu on the 3D Document Toolbar. (Click the drop-down arrow to the right of the Linear icon to see the menu of commands.)
- Select Arc Center to Arc Center.
- Optional:
- Select Lock tool to use the command more than once.
- Click a radio button to select a measurement axis or for the distance between the arcs' centerlines (the default is Normal).
- Enter a hyperlink to a file or to a document and user view within the current file.
- Position your cursor on an arc and click. (Selectable arcs are highlighted as you mouse over them.) The selected arc remains highlighted.
- Select the second arc.
- The arc center points appear in yellow. Drag and click to position the markup in the scene.
- Optional: Click Copy to copy the markup content to the Windows clipboard.
- Click Stop when you're finished taking multiple measurements. Click Close (or X) to end the command and close the dialog box.
Measure the distance from an arc center to a surface point
- Open the Linear menu on the 3D Document Toolbar. (Click the drop-down arrow to the right of the Linear icon to see the menu of commands.)
- Select Arc Center to Surface Point.
- Optional:
- Select Lock tool to use the command more than once.
- Click a radio button to select a measurement axis or for the distance between the arcs' centerlines (the default is Normal).
- Enter a hyperlink to a file or to a document and user view within the current file.
- Position your cursor on an arc or circle and click. (Selectable arcs and circles are highlighted as you mouse over them.) The selected arc or circle remains highlighted.
- Position your cursor over a point on a surface and click. (When you mouse over a surface, crosshairs indicate selectable points and the surface is highlighted.)
- Drag and click to position the markup in the scene.
- Optional: Click Copy to copy the markup content to the Windows clipboard.
- Click Stop when you're finished taking multiple measurements. Click Close (or X) to end the command and close the dialog box.
Measure the distance between two surface points
- Open the Linear menu on the 3D Document Toolbar. (Click the drop-down arrow to the right of the Linear icon to see the menu of commands.)
- Select Surface Point to Surface Point.
- Optional:
- Select Lock tool to use the command more than once.
- Click a radio button to select a measurement axis (the default is Normal).
- Enter a hyperlink to a file or to a document and user view within the current file.
- Position your cursor over a point on a surface and click. (When you mouse over a surface, crosshairs indicate selectable points and the surface is highlighted.)
- Select the second surface point.
- Drag and click to position the markup in the scene.
- Optional: Click Copy to copy the markup content to the Windows clipboard.
- Click Stop when you're finished taking multiple measurements. Click Close (or X) to end the command and close the dialog box.
Measure the distance between a surface point and an edge
- Open the Linear menu on the 3D Document Toolbar. (Click the drop-down arrow to the right of the Linear icon to see the menu of commands.)
- Select Surface Point to Edge.
- Optional:
- Select Lock tool to use the command more than once.
- Click a radio button to select a measurement axis (the default is Normal).
- Enter a hyperlink to a file or to a document and user view within the current file.
- Position your cursor over a point on a surface and click. (When you mouse over a surface, crosshairs indicate selectable points and the surface is highlighted.)
- Position your cursor on an edge and click. (Selectable edges are highlighted as you mouse over them.) The selected edge remains highlighted.
- Drag and click to position the markup in the scene.
- Optional: Click Copy to copy the markup content to the Windows clipboard.
- Click Stop when you're finished taking multiple measurements. Click Close (or X) to end the command and close the dialog box.
Calculate the sum of the lengths of connected edges
- Open the Linear menu on the 3D Document Toolbar. (Click the drop-down arrow to the right of the Linear icon to see the menu of commands.)
- Select Sum of Connected Edges.
- Optional:
- Select Lock tool to use the command more than once.
- Enter a hyperlink to a file or to a document and user view within the current file.
- Position your cursor on an edge and click. (Selectable edges are highlighted as you mouse over them.) The selected edge remains highlighted.
- Select the next edge—it must be connected to the first. Continue selecting edges as needed. Double-click the last edge, but DO NOT select first.
- The measured edges and end point are highlighted yellow. Drag and click to position the markup in the scene.
- Optional: Click Copy to copy the markup content to the Windows clipboard.
- Click Stop when you're finished taking multiple measurements. Click Close (or X) to end the command and close the dialog box.
Measure the distance between two surfaces
- Open the Linear menu on the 3D Document Toolbar. (Click the drop-down arrow to the right of the Linear icon to see the menu of commands.)
- Select Distance Between Two Surfaces.
- Optional:
- Select Lock tool to use the command more than once.
- Enter a hyperlink to a file or to a document and user view within the current file.
- Click on a surface on the model. (Selectable surfaces are highlighted as you mouse over them.)
- Click on a second surface on the model—the second surface must be parallel to the first.
- Drag the label into position and click once.
- Optional: Click Copy to copy the markup content to the Windows clipboard.
- Click Stop when you're finished taking multiple measurements. Click Close (or X) to end the command and close the dialog box.
Right-click a dimension markup to make changes to its properties. A context menu will appear and provide command options that are based on the selected markup type. For example, a Point Coordinates markup context menu will differ slightly from an Arc Center to Arc Center markup context menu. (See the Working with 3D Markups for details.)