Skip table of contents

Upgrade Installation

If you have Centro 7 already installed, use the following steps for upgrading to the next version of Centro 7.

To upgrade from Centro 7.12.x to Centro 7.13.x:

1. Gather the latest necessary files.
  1. Centro7-ArangoDB-Linux.zip

  2. CentroWebApp.exe

  3. PipelineHostService.exe

  4. PipelineManagerService.exe

  5. ArangoDB 3.x.x Enterprise edition (Enterprise is recommended though the Community version may be used as well). 

    One can download from the following link:
         https://www.arangodb.com/download-arangodb-enterprise/install-enterprise/


2. Pause the pipelines.
  1. Navigate to the Pipeline Manager.

  2. Pause each of the running pipelines to allow remaining jobs to complete.


3. Wait for any remaining jobs to finish processing.

To ensure, jobs are not cut off mid process, make sure all jobs from each pipeline are no longer running. To do this,

  1. For a given pipeline, go to the Jobs Explorer.

  2. Use the Status Filter for Starting or Started jobs.

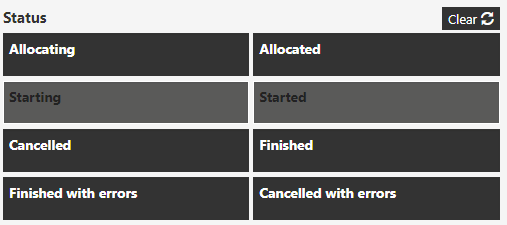
  3. Jobs should appear in the results.


4. Stop the Web Site

In iiS Manager, stop the website or put up your maintenance window.


5. Turn off services
  1. Stop the pipeline host service.

  2. Stop the pipeline manager service.

The pipeline host service and the pipeline manager service are designed to start automatically. Setting them to a disabled mode will ensure they remain off.


6. Backup the database

Backup the database to keep as a back up in case of upgrade issues. To dump the database, see Arango Database Backup section of the System Backup help page.

Directory of Arangodump.exe:

C:\Program Files\ArangoDB3e 3.x.x\usr\bin

A typical Windows / Linux command to run is,

CODE
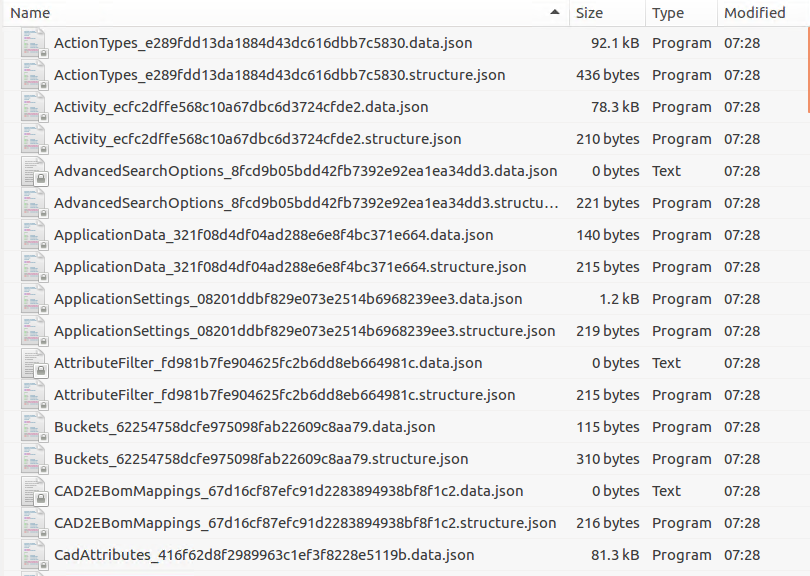
arangodump --server.database "ActifyDB" --output-directory "dump"

The folder containing the dump of the database should contain a number of .json files. If the directory is empty or only has a few files then an error must have occurred or the procedures was not run properly.

Best Practice

It is strongly recommended to follow the System Backup procedures before performing any Centro upgrade as well as doing on a regular basis to back up your Centro system.


7. Run the database script
  1. Unzip the files.

  2. Run the setup.sh script. 
    The script automatically upgrades the current database or creates new databases if one doesn't exist.

NOTE: Requires ActifyDB User and Password information

Run ./setup.sh -u MyUser -p MyPassword
Where: MyUser and MyPassword are the ActifyDB values


For organizations running Centro on Windows, 

  1. Unzip the files.

  2. Navigate to the database folder in a administrator - PowerShell window.

  3. Run the .\setup.bat script.
    The script prompts for the database root password, database name, database user account that connects Centro to the database, and whether you want a new random password created.


ArangoDB via SSL

If the ArangoDB database connection prior to this upgrade was configured for SSL as detailed on the SSL Configuration page, the "setup.sh" or "setup.bat" file will require editing based on the ArangoDB server's operating system.

  1. Unzip the files.

  2. Open setup.sh or setup.bat for editing
    Append the ssl server.endpoint information to the setup file. Server "yourserverhostname:8529" used as example below.

    • LINUX - setup.sh edit lines 69 and 76 and append "--server.endpoint ssl://yourserverhostname:8529"

      Original setup.sh

      TEXT
      69	arangosh --server.username $USER --server.password $PWD --javascript.execute install.js db:$DATABASE user:$USER pwd:$PWD
      
      76 	arangosh --server.username $USER --server.password $PWD --javascript.execute setup.js db:$DATABASE force:$FORCE $VERSION

      to:

      Modified setup.sh

      TEXT
      69 	arangosh --server.endpoint ssl://yourserverhostname:8529 --server.password $PWD --javascript.execute install.js db:$DATABASE user:$USER pwd:$PWD
      
      76 	arangosh --server.endpoint ssl://yourserverhostname:8529 --server.username $USER --server.password $PWD --javascript.execute setup.js db:$DATABASE force:$FORCE $VERSION


    1. WINDOWS -setup.bat edit lines and append "LINUX - setup.sh edit lines 46 and 53 and append "--server.endpoint ssl://yourserverhostname:8529"

      Original setup.bat

      TEXT
      46 CALL %ARANGO% --server.username %USER% --server.password %PWD% --javascript.execute install.js db:%DATABASE% %WIPE_ARG% user:%USER% pwd:%PWD%
      
      53 CALL %ARANGO% --server.username %USER% --server.password %PWD% --javascript.execute setup.js db:%DATABASE% %FORCE%

      to:

      Modified setup.bat

      TEXT
      46 CALL %ARANGO% -server.endpoint ssl://yourserverhostname:8529 --server.username %USER% --server.password %PWD% --javascript.execute install.js db:%DATABASE% %WIPE_ARG% user:%USER% pwd:%PWD%
      
      53 CALL %ARANGO% -server.endpoint ssl://yourserverhostname:8529 --server.username %USER% --server.password %PWD% --javascript.execute setup.js db:%DATABASE% %FORCE%

      Remember to use the ArangoDB ssl endpoint information detailed in the ArangoDB 3.x Configuration section of the SSL Configuration  section.


  3. Run the setup.sh script. 
    The script automatically upgrades the database or creates new databases if one doesn't exist.

  4. NOTE: Requires ActifyDB User and Password information

    Run ./setup.sh -u MyUser -p MyPassword
    Where: MyUser and MyPassword are the ActifyDB values


8. Note the database user password

It is strongly recommended to use a database user other than the root to connect the application and services to the database. The 7.6 setup.bat can Create a new user from the arango shell (arangosh) or from the web GUI.

When upgrading, an option for a "Centro" user is created and a random password is created. This is done so one does not have to create their own user nor need to use the root user.

Note: If you had a previous user named "Centro", for security reasons the password will be overwritten with the new random one.

Use the user and password for the webapp, pipeline host, and pipeline manager services installations when credentials are asked for.


9. To upgrade the web server and services without uninstalling previous versions
  1. Run the following files to perform the upgrade;

  • CentroWebApp.exe

  • PipelineHostService.exe

  • PipelineManagerService.exe

Be sure to use the correct information for the installation steps;

  • IP address of the Arango Database currently being used

  • ArangoDB User Password

    • Use the newly assigned User and/or Password if they weres changed during the Deploy process

The installations automatically upgrade the application and services or installs new if Centro 7 does not already exist.

  1. Restart services and the web app.

Note: Client side browsers may need caches cleared.

NOTE: If the User or Password was changed during the deploy process, and you used the incorrect values, then they must be reset afterwards for the Webapp and both Services to run.

See link below for instructions ;

WebApp fails to connect and services fail to start after DB Update and/or Password change


10. Configuraton File Check

After performing a CENTRO update, you must check the following files in case they did not retain their previous settings.

  • C:\inetpub\wwwroot\Centro

    • Only if Cookies are used

    • Example:

    • Change: <httpCookies httpOnlyCookies="true" requireSSL="false" / >

    • To: <httpCookies domain=".<Your Domain.com>" httpOnlyCookies="true" requireSSL="false" />

    • Substitute "Your Domain.com" with your actual domain

    • Web.config

  • C:\Program Files\Actify\Centro\PipelineHostService\Configuration

    • OpenGL setting

    • If running on a VM, set to OpenGL

    • Gets reset back to OpenGL2

      • Change to: <add key="ACT3DGraphicsDriver" value="OpenGL"/>

    • appSettings.config

    • centroSettings.config

      • Activate Features (false to true)

      • Email information for “Email Notification Pipeline”


  • C:\Program Files\Actify\Centro\PipelineManagerService\Configuration

    • Activate Features (false to true)

    • Can copy from the \PipelineHostService\Configuration folder

    • centroSettings.config

 See Centro Upgrade File Check for a summary.


JavaScript errors detected

Please note, these errors can depend on your browser setup.

If this problem persists, please contact our support.