Skip table of contents

Rule-Based Coloring

Rule-based coloring lets you build your own rules to visualize an analysis of your 3D models based on those rules.

Rule-based coloring graphically shows where rule matches appear in an assigned color/state, no matches, and those not available (meaning items that cannot be evaluated because they do not contain the information rules are attempting to match).

To color a model based on rules,

  1. Decide how to color parts.
  2. Add rules.
  3. Select all parts or select individual parts.
  4. Click ANALYZE.
  5. View the graphical representation.
  6. View, copy, or export the rule-based coloring results.
  7. Export rules if necessary for later use.


Colors

Select how the parts should be color based on matching, not matching, or undetermined based on the defined rule(s).

Types

  • Match - parts that match the specified rule(s).
  • No Match - parts that do not match the specified rule(s).
  • Not Available - parts that could not be determined because they may lack the information to analyze.


StateDefinition
ExistingLeave the color of the part as is.
TransparentLeave the color of the part as is however it is semi-transparent.
Hidden Hide the part
SpecificChange the part color to the one specified from the color picker.
Adding a rule

The act of adding a rule is a selection of various pull

To add a rule,

  1. Click ADD....
  2. Select a Property Type (Physical or CAD)
    Physical refers to physical properties (volume, surface area, or center of mass)
    CAD are attributes and meta data from the CAD file.
  3. Select a Property Name.
  4. Select a Value Type
  5. Select what to Compare To.
  6. Select Operation Type.
  7. If necessary, type in an Operation Value.
  8. Click OK.


Edit a rule

 To edit a rule,

  1. Select a rule to edit.
  2. Click Edit....
  3. Change the items in the Rule dialog window.
  4. Click OK.

Note

If you've saved your rule to an exported xml file and have since changed it, remember to export it again to retain your changes for future use.

Delete a rule

 To delete a rule,

  1. Select a rule to edit.
  2. Click DELETE.
Clear all rules

 To remove all the rules,

  1. Click CLEAR.
Import / Export

Rules are not saved within user views or ACT3D files. If you create a rule that you want to use again, consider exporting the rule to an XML file to reuse it.

To export a rule,

  1. Click EXPORT....
  2. Navigate to the folder to save the rule.
  3. Provide a name for the file.
  4. Click Save.


To import a rule,

  1. Click IMPORT....
  2. Find and select the exported rule file.
  3. Click Open.
Select Parts

Select All Parts to evaluate the entire set of parts.

Select Parts to create a list of selected parts to be evaluated.

Create User View

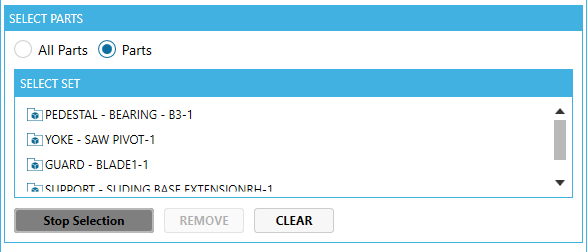
To save results to a user view,

  1. After analyzing, click CREATE USER VIEW.
  2. Enter a name for the new user view.
  3. Check Make this the startup view if you want this to be the view seen when opening the ACT3D file.
  4. Click OK.

Note

The rules are not saved with the user view; only the colored visualization.

If you wish to rerun your rules, export them before closing the rule-based coloring dialog to import them at a later time.

Reset

 Click RESET to reset the rule-based dialog.


JavaScript errors detected

Please note, these errors can depend on your browser setup.

If this problem persists, please contact our support.