
Measure Tube Length steps
See also Measurement Tips.
Insert in Working with Advanced Measurements
- Open the Advanced Measurements menu on the 3D Document Toolbar. (Click the drop-down arrow to the right of the Linear icon to see the menu of commands.)
- Select Tube Length.
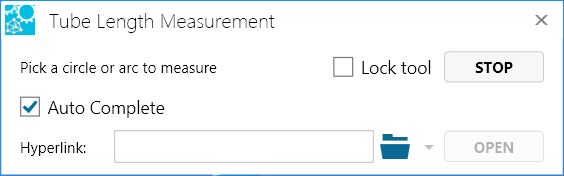
The Tube Length Measurement dialog box provides the following options:- Auto Complete - Signals SpinFire to automatically traverse the pipe — following all the straights and bends — to determine its length. Selected by default.

Note: If you choose to clear the checkbox, you will need to manually select each arc from the beginning of the pipe to its end. During selection, if a mistake is made, you will need to restart the selection process. However, manual selection can be useful when you want to measure only a portion of the tube.
- Lock tool - Select to use the command more than once.
- Hyperlink - Enter a link to a file or to a document and user view within the current file.
- Auto Complete - Signals SpinFire to automatically traverse the pipe — following all the straights and bends — to determine its length. Selected by default.
- Position your cursor on the starting arc or circle and single-click. (Selectable arcs and circles are highlighted as you mouse over them.) The selected arc or circle remains highlighted.
- Position your cursor on the ending arc or circle.
- Click once to see a highlighted line that indicates the shortest distance between the two arcs.
- Double-click to accept the measurement and see the markup label.
- Position the markup, then click once. The highlighted line changes color to indicate that the measurement is complete.

- At this point, you have the following options:
- Click Copy to copy the markup content to the Windows clipboard.
- Click Export... to save the markup content to a .csv file. (See also Create a tube length bill of materials on this page.)
- Click Stop when you're finished taking multiple measurements.
- Click Close (or X) to end the command and close the dialog box.
Recommendation
To find arcs and circles more easily, select your model and render as Smooth with Edges. See also Measurement Tips.
After completing a tube length measurement (see Measure tube length on this page), you can create a bill of materials by exporting the results to a .csv file. A bill of materials contains the following information:
Length
Diameter
Arc1 Center XYZ
Arc2 Center XYZ
BendRadius
BendAngleDegrees
BendCenter XYZ
Intersection XYZ
Total length
Note
Differing Diameters - If the diameter of the tube changes along its course, values in the tube length bill of materials may be incorrect.
Unicode Characters - Because the .csv format is simply that of a text delimited file, Japanese, Chinese (Simplified and Traditional), and Korean characters cannot be properly represented. Tube length results in these languages will be exported in English.
To create a tube length bill of materials:
- After completing a tube length measurement, click the Export... button.

- Enter a file name.
- Click the Save button.
Alternatively,
- On the Markups list, right-click on a tube length measurement.
- Select Export... in the context menu.
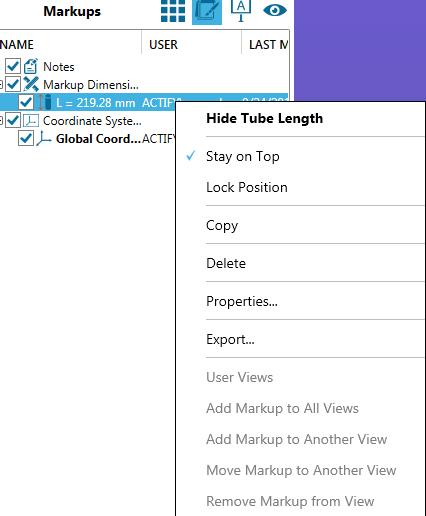
- Enter a file name.
- Click the Save button.